Remote imaging facilities
One of our specialties here is remote facilities. You start with a ScopeDome, along with a mount and telescope. Next, add a computer and some weather sensors, locate it in the corner of some foreign field, and voila! a robotic imaging facility. Obviously, putting it together is a little more complicated than that, but once the bugs are ironed out, that’s pretty much what you have. We’ve put together several now, and we’ve found that after a shakedown period, they’re proving to be a success.
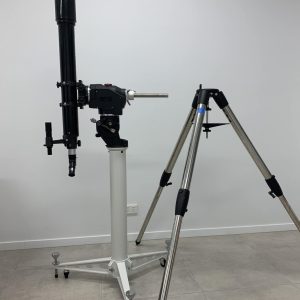
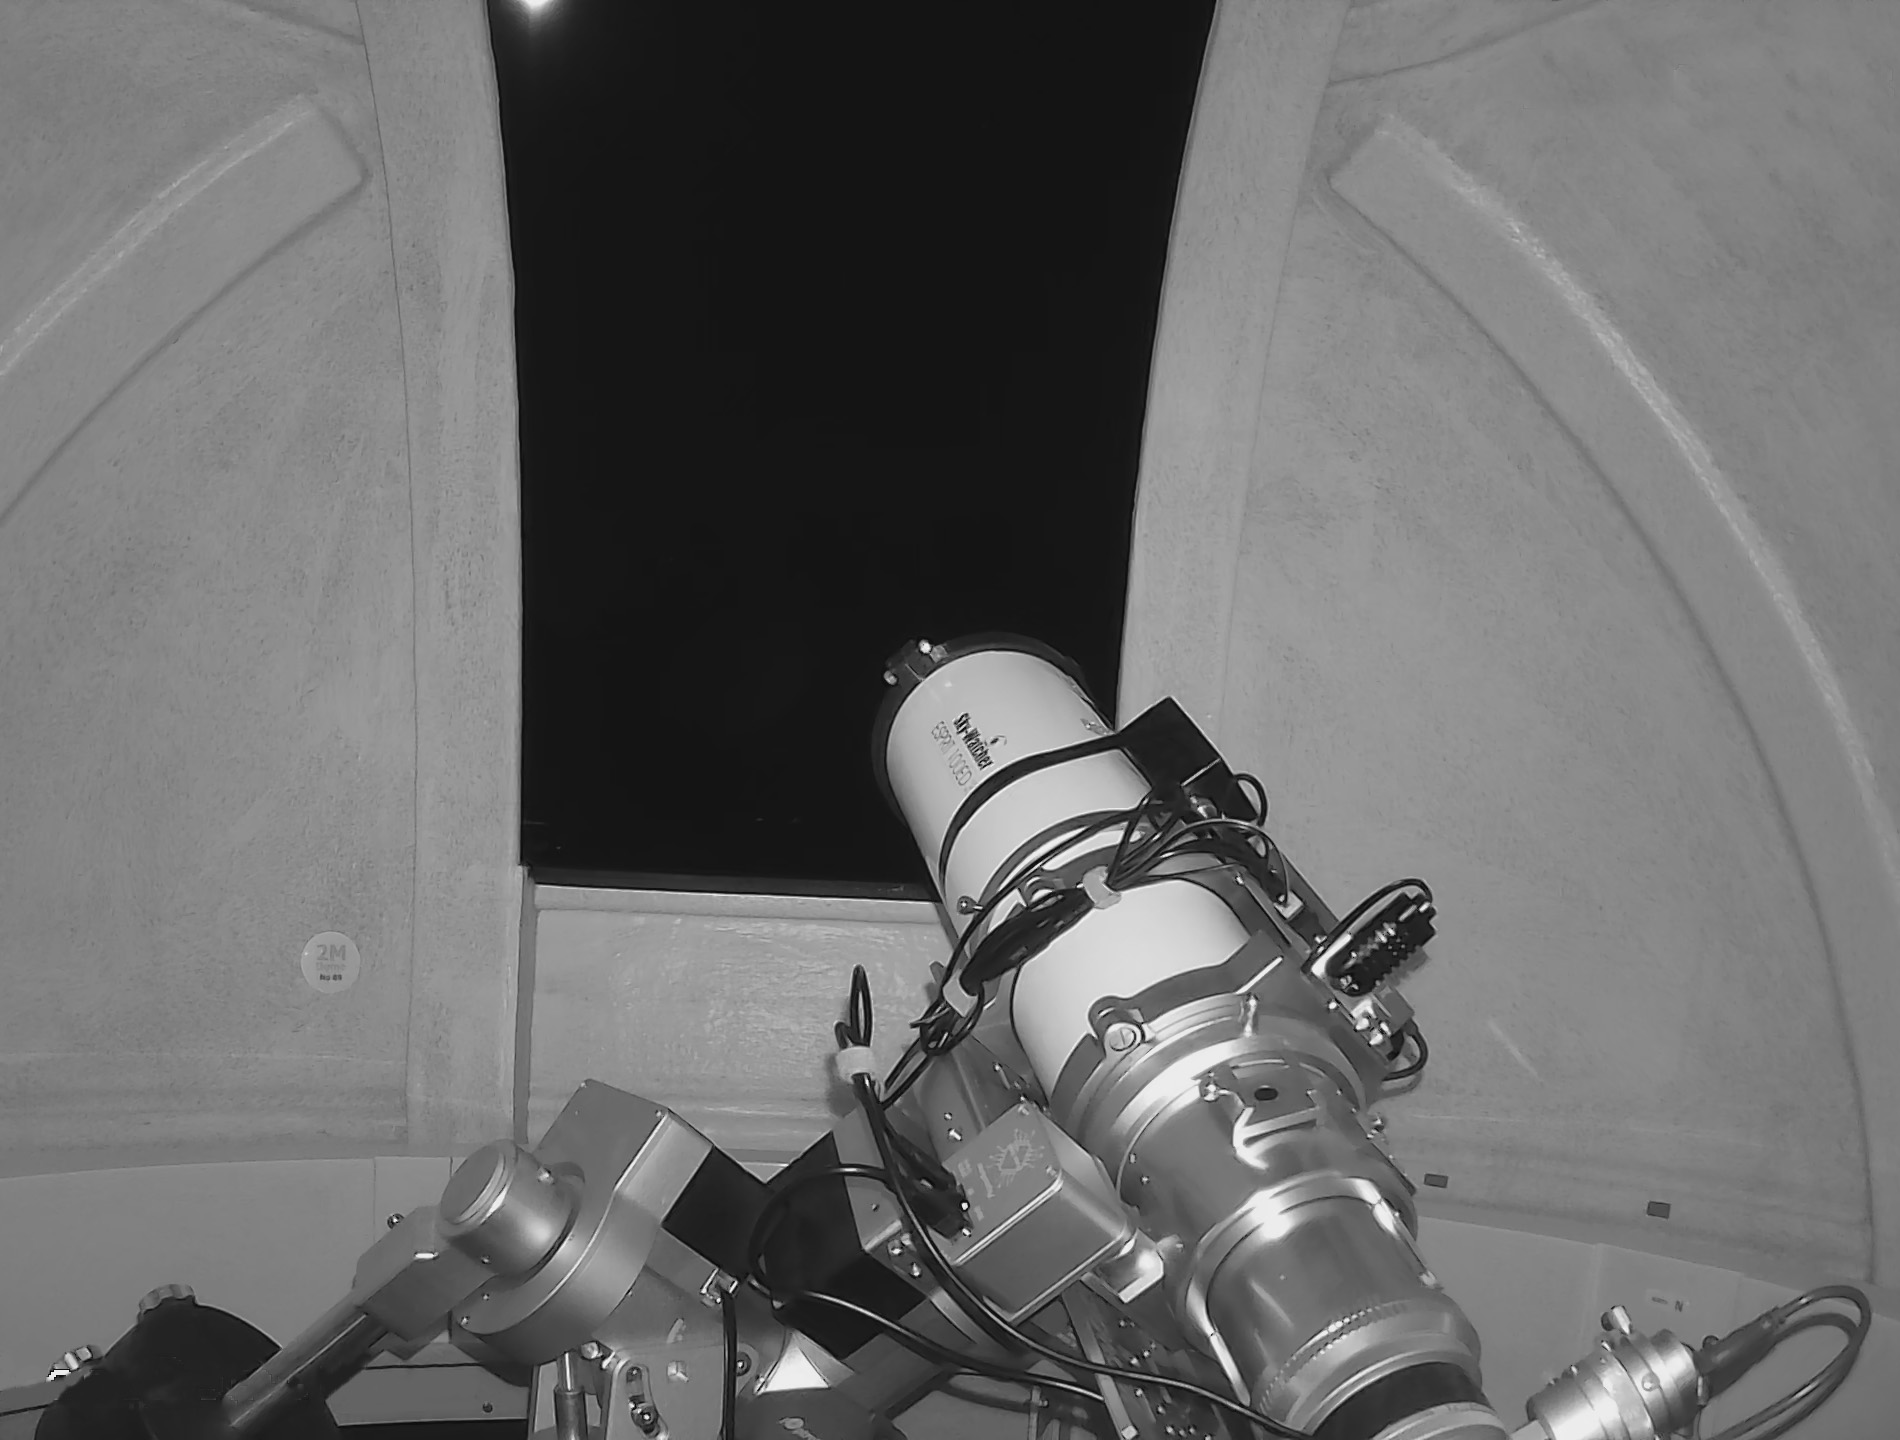
Typically, these facilities allow their owners to take deep space photos from locations far from the city. We can also use these facilities for scientific purposes, such as asteroid spotting, photometry and related stuff. My current favourite is a 2-metre dome in Central Victoria, with an iOptron CEM40 for a mount, and a Sky-Watcher 100mm Esprit refractor carrying a QHY268C camera. Here it is, as seen by the internal surveillance video.
I’ve used this to get a number of nice “test” images of nebulas and galaxies. I’ve also imaged the recurrent nova T Coronae Borealis over the last year in expectation of it going off. I’m still waiting on that one…
Getting a shot of the Moon is… difficult?
These facilities are primarily intended for use with deep space objects like stars, nebulas and galaxies. But clearly there’s no reason why they can’t be used for solar system objects. I recently used one facility for a comet. So, when I saw there was an upcoming Lunar Eclipse, I started thinking about how I might get images. There were two main challenges though.
First, strangely enough, finding the Moon isn’t all that easy. When you’re not in the dome you can’t just stand behind the scope and swing it. To find targets, the automated facility uses “plate solving”. This takes a photo and reads the star pattern, recognising where it is pointing and shifting if necessary. The full Moon is terribly bright, and this glare blots out all nearby stars, rendering plate solving impossible because your computer can’t see the stars.
The solution to this was relatively straightforward. I programmed the system to use plate solving to find four points, each about 15° north, south, east and west of the Moon. Once the mount had those dialed in, I could slew blindly to the Moon’s coordinates. Because I had surrounded the Moon with known points, I was confident that the mount could do the last one blind.
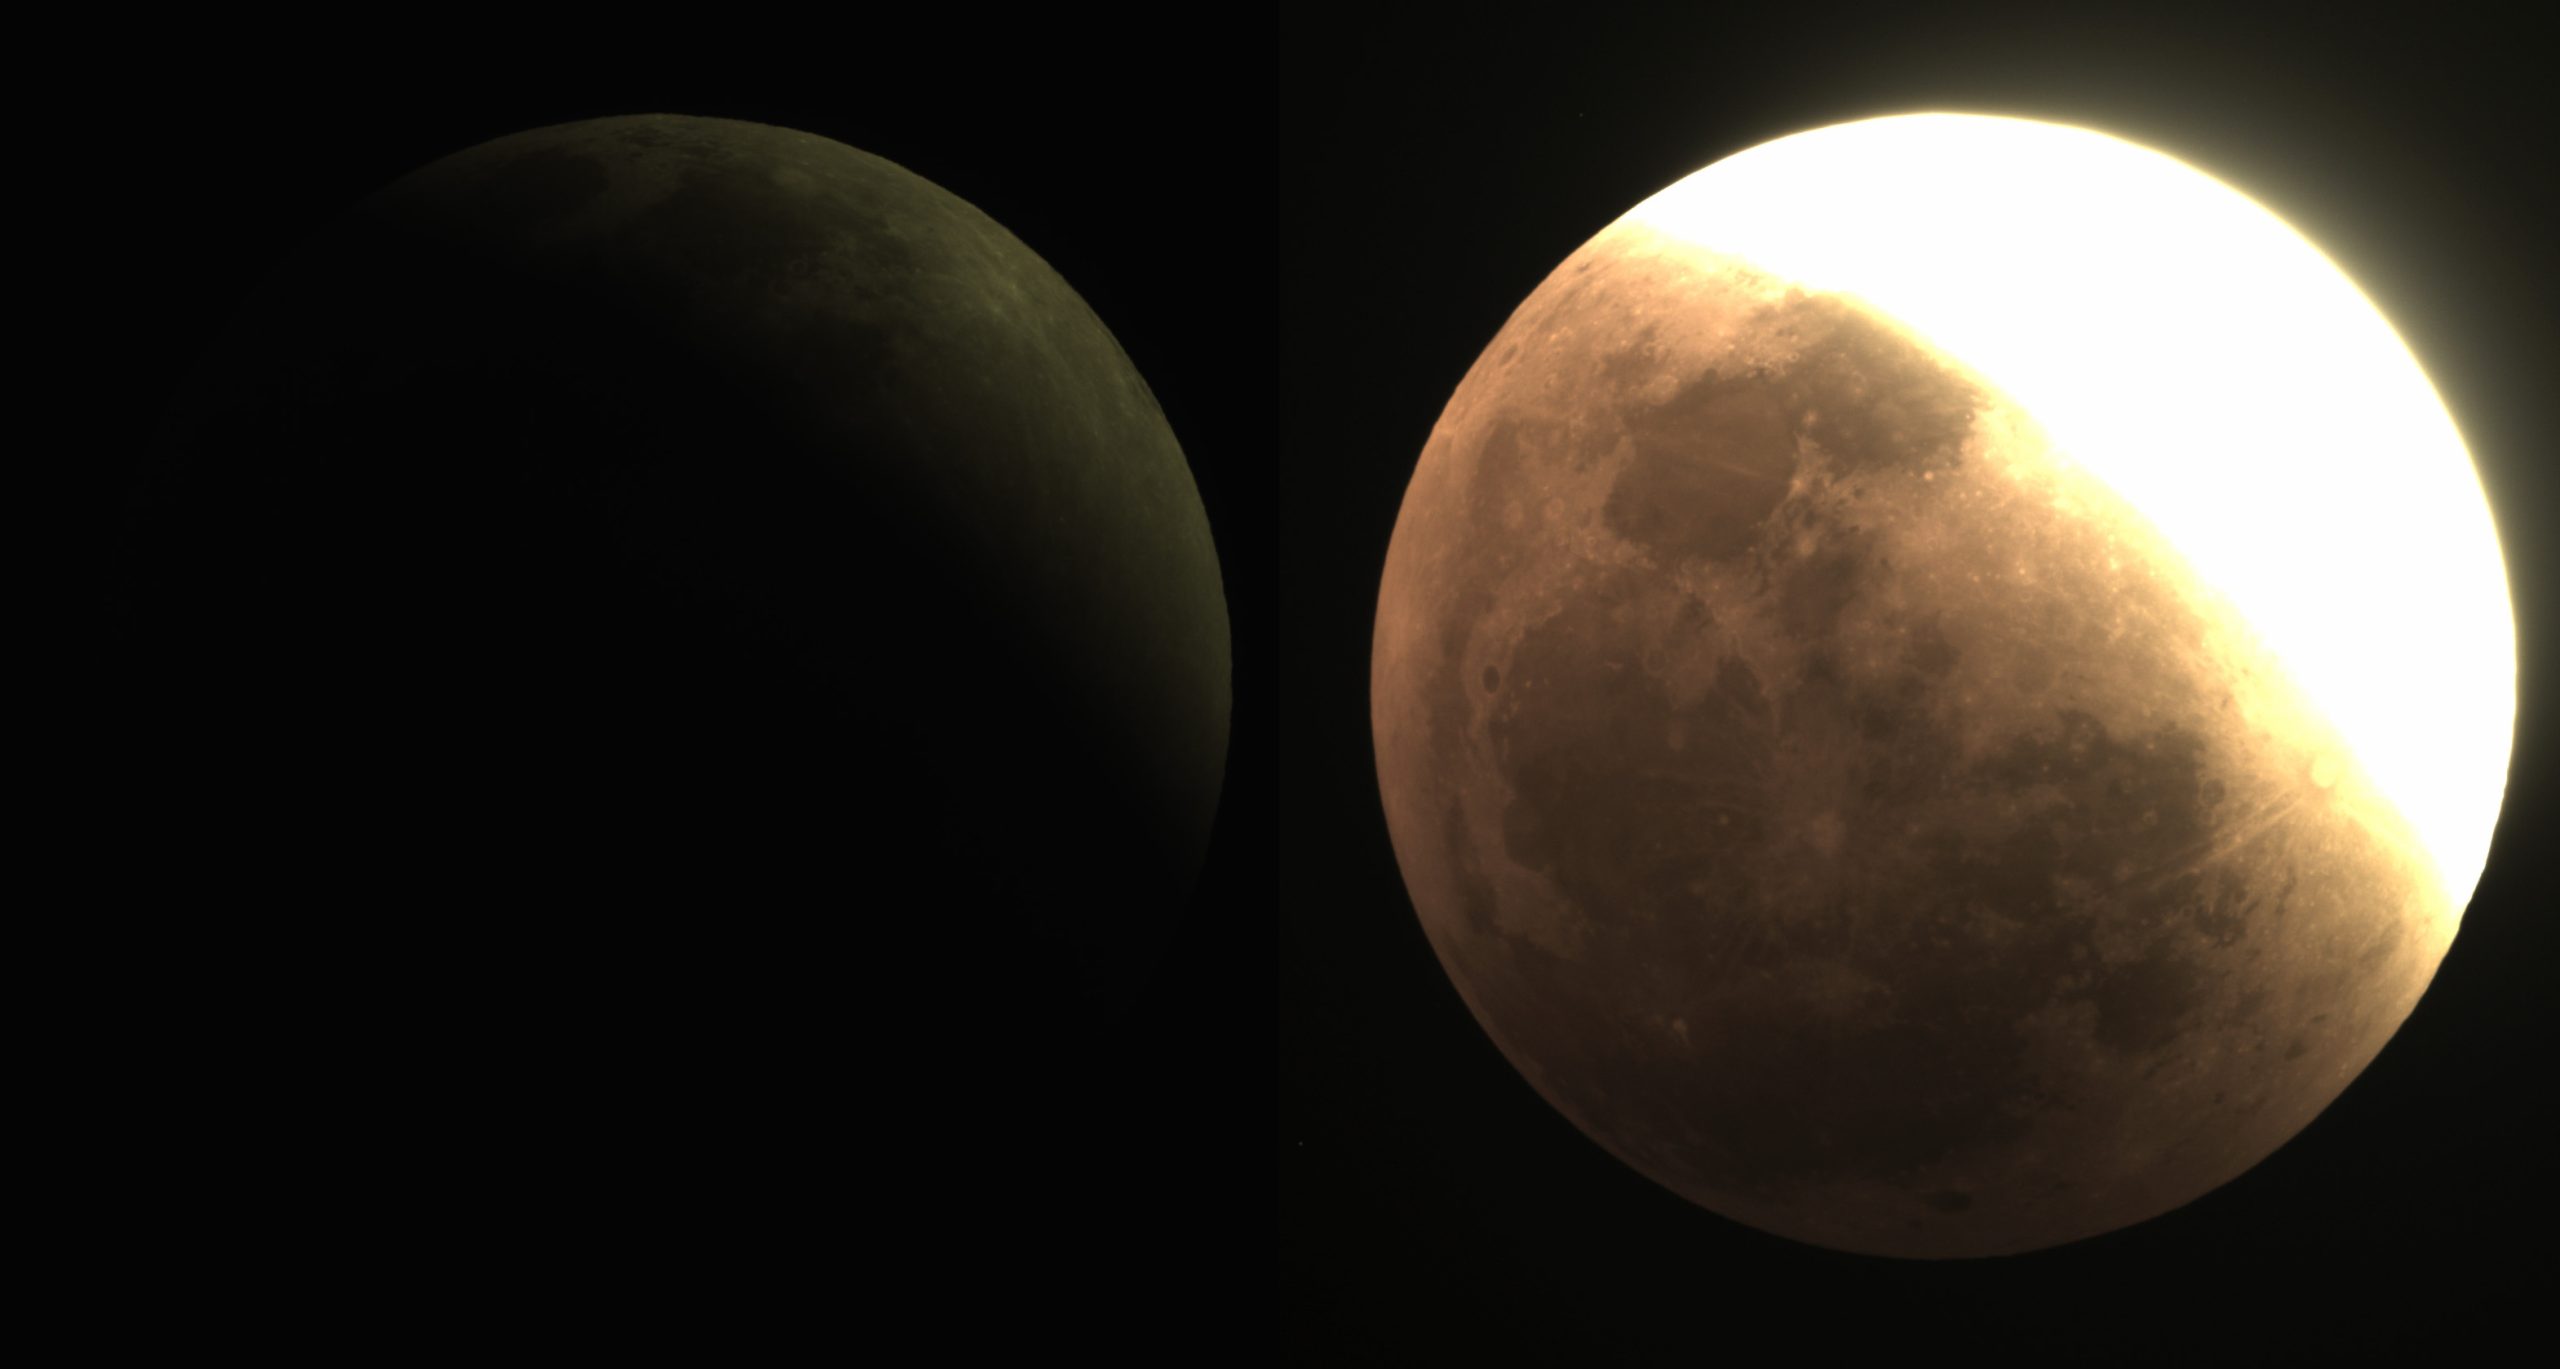
The second challenge was setting the exposure on the camera. The full Moon is so bright that the sensitive camera overexposed at just 1 millisecond. However, at the height of the eclipse, the blood Moon is surprisingly dim, and I estimated I’d need four seconds’ exposure.
To achieve this range, I programmed a bracket of exposures, starting at a half a millisecond, then doubling and doubling until I reached four seconds. This would give me lots of exposures, and I could choose which one gave the best image. Here’s an example of two images taken at about the same time.
Actually doing it – the theory and the practice
The way it should have gone
The facility is controlled using a computer program called Starkeeper Voyager. Using Voyager, I can run the entire night in a preplanned script, rather like a macro programming language.
The plan was to wait until about 1:30am, which was before the eclipse started, and check that the weather system gave the all-clear. The computer would then move the mount to the first of the plate solve points, chill the camera, slave the dome, and only then open up. Once it could see stars, it would automatically focus the telescope and plate solve to confirm it was in the right spot. It would then slew to the other plate solve points before moving to the Moon. Once there it would begin the bracketed exposures and wait ten minutes before taking more exposures. It would do this until about 5am and then shut itself down. During all this time, the computer would keep an eye on the weather, and bale for the night if clouds showed up.
Pretty comprehensive, right? I was feeling quite smug about how I’d solved the problems.
You can just see where the story is going…
The way it actually went
A few days before this, I’d prepared a training video on how to use this system for the client, an astronomy club. In order to make the system as safe as possible while being operated by club members, I decided to add an extra layer of protection by allowing the weather station to communicate directly with the dome. This way, it would close in poor conditions regardless of what the computer was doing. What I didn’t realise was that I’d made it too secure.
By 1:30 in the morning I was getting a bit tired, but I decided to make sure the system started off OK. I watched through the internal surveillance camera as the facility started itself up and began to move the scope and dome. All was going well, and the external surveillance cameras were saying the clouds that had been around earlier had now cleared. However, when I expected the dome to open, nothing happened. After a worrying pause, I could see the system begin to pack itself up again. What had happened?
I didn’t have much time before the eclipse would begin, so I rushed through all the possibilities. Eventually I got to the weather system, and to my horror, saw that the sky temperature was way above normal. The cloudwatcher interpreted this – wrongly – as “overcast”. I had to break out of the script, disable the weather protection (I double checked the satellite image and the all-sky camera) and restart where the exposures began. Sadly, I’d missed the start of the eclipse and with it, the opportunity to get the luminance layer that would sharpen up my totality shot. Bummer. I only had one chance.
Once I got back on track, it all worked fine, and by 5am I was back in my bed, and the computer was downloading images.
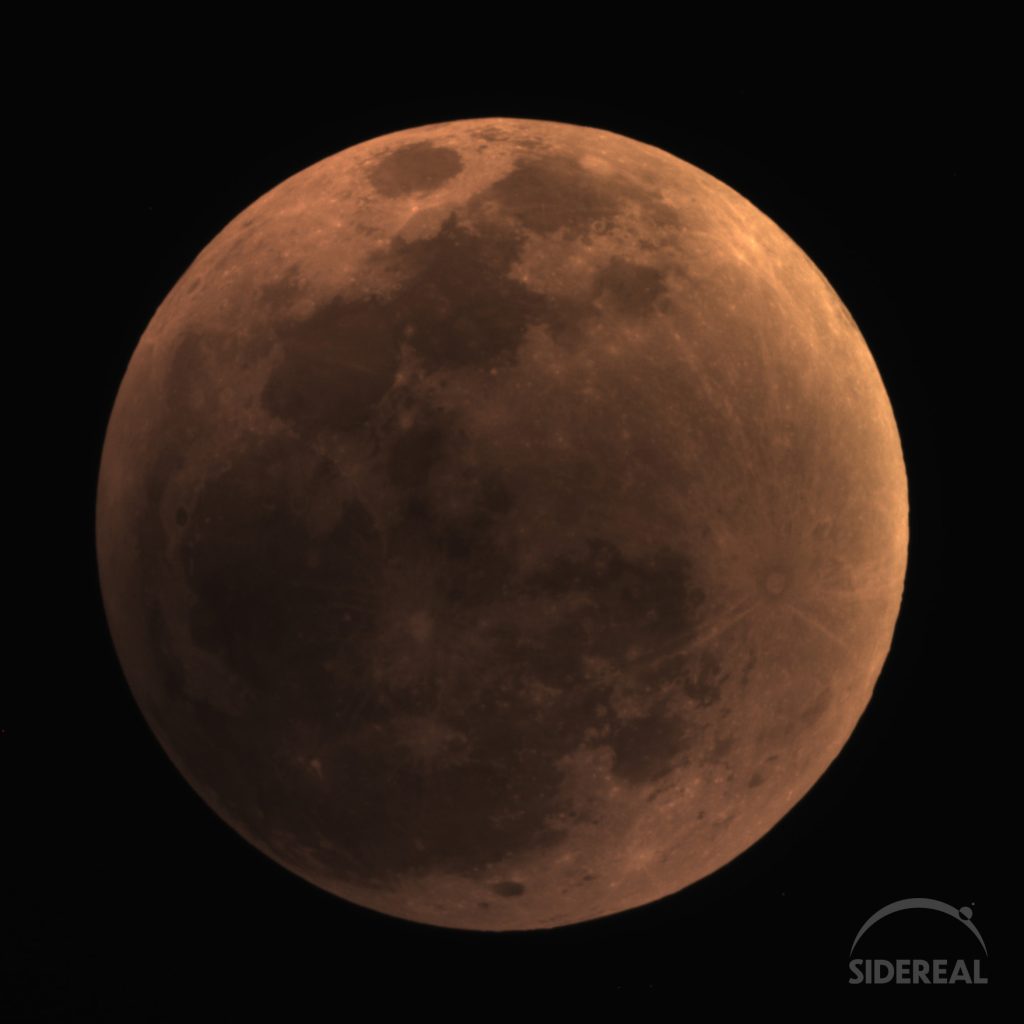
The final sequence
From the start of the sequence to totality at 4:10 I got eight complete brackets. From each of those I selected one and gave it the absolute minimum processing (which was simply to convert the raw files so I could open them in Photoshop. Then I arranged them so they were on the same part of the frame). I’ve put the totality shot (blurry as it is) at the top, and you can see the full sequence is below.
Finally, after some images were posted on line, there was a small debate about the colour of the Moon. I’m a bit colourblind, so I’d left the colour as it came out of the camera. The boss, Paul, looked at it the next day and said it had a green cast, and corrected it slightly (thank you), but that affected the light shots rather than the red ones.
So behold, a Lunar Eclipse!