

I’m relatively new at Sidereal Trading still, and one of the things I’m keen to do is become familiar with the products. (I hope you realise this means “borrow the demonstration stock”!) There’s a lot to learn about, including iOptron mounts, Pegasus power and dew control equipment and Lunatico automation gear.
So, where to start?
I decided to start with a mount, and selected the iOptron CEM40EC. It’s been on display for a little while now and has been superseded by the CEM40EC which has a redesigned saddle and a built-in iGuider guide scope and camera.
I haven’t used an iOptron mount before. I have an NEQ6 which is heavy and good but the iOptron is smaller and lighter, but despite that, it has a similar carrying capacity.
One of the significant differences between the two mounts is that the iOptron has microencoders that allow it to move at a near-perfectly constant rate. This gets around problems related to periodic error – those high and low parts of your cogs that make the mount slow down or speed up every time the cog goes around.
I decided that my refractor would go on the CEM40EC quite nicely.
The evening
I took the mount home, but it’s still late winter, so I had to set up in the dark. I felt like a complete neophyte, fumbling about trying to find the locations of drive engagement locks, USB ports and so forth. I had already downloaded the relevant drivers onto my laptop and didn’t plan to use the hand controller.
The iOptron mount has a built-in polar alignment camera, but while I’d installed the software and even got an image during the day, I decided to do what I normally do and use SharpCap. Frankly, I didn’t expect I’d get much done on the night, and my goal was simply to get polar aligned and maybe slew to a target.
I used the bubble level to roughly level the mount. My yard is on a bit of a slope, and it always foxes me. The iOptron has a “find zero” feature that is very useful for positioning the mount prior to polar alignment.
Polar aligning
Aligning the mount was surprisingly easy. It was fully loaded with two counterweights as well as my gear, but azimuth adjustment was smooth and simple. I had a little more difficulty with altitude, but once I unlocked the wedge it was a lot easier! I was able to get an “excellent” alignment within a couple of minutes, helped by the fact that because I was in a familiar location I knew pretty much where the Pole was.
Target acquisition
Once aligned, I used SGP to acquire the target. The mount not only knew that it was starting at the pole, but also it knew very accurately (through the “find zero” procedure) which direction the counterweight was pointing. Because of this, slewing was astonishingly accurate and I’d plate solved in seconds, and on my target very quickly after.
That was quick!
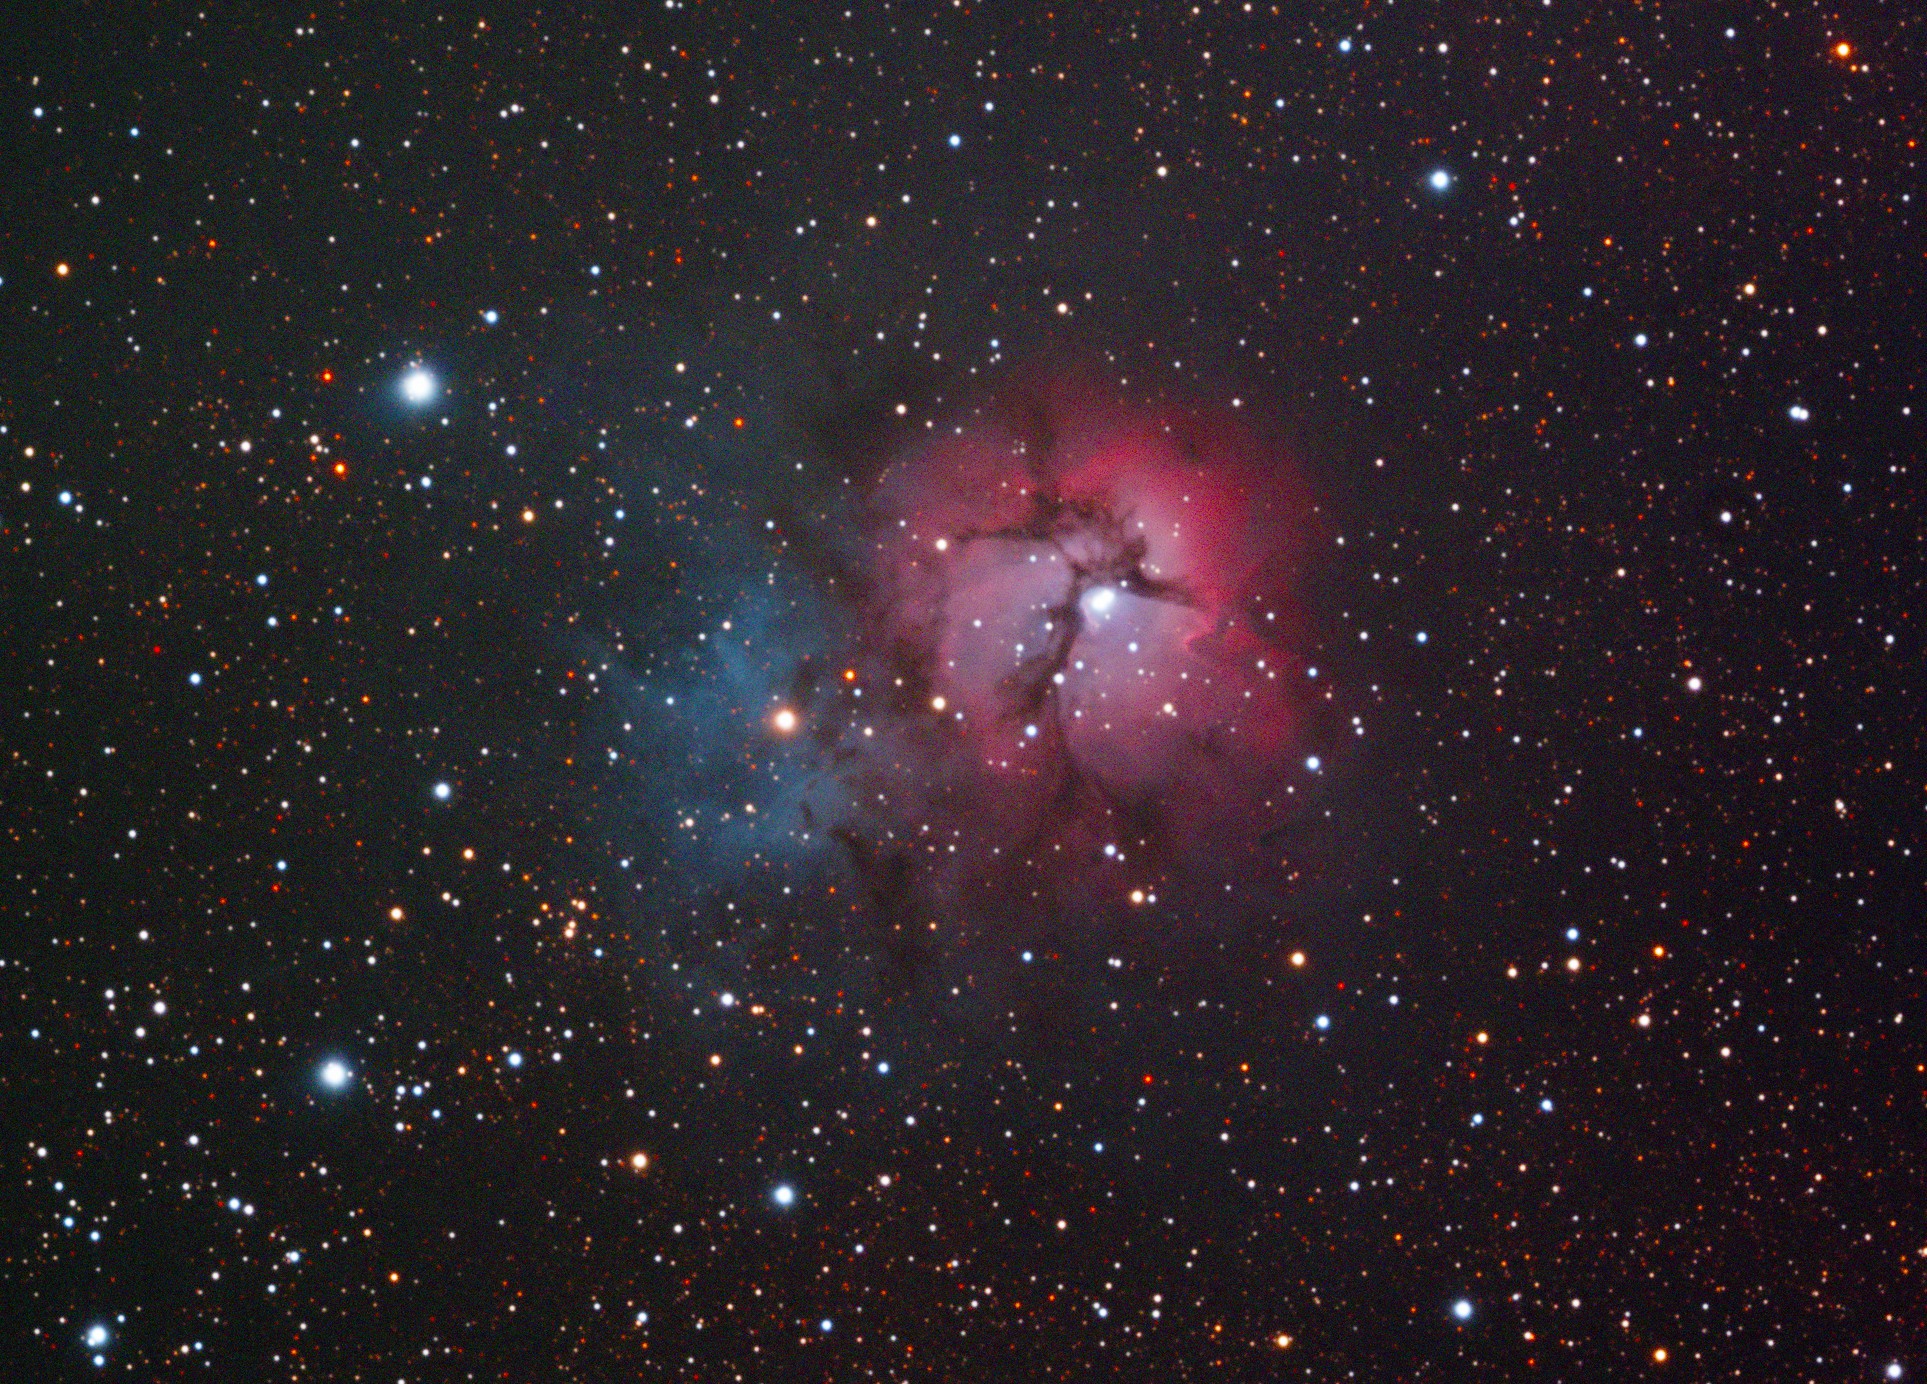
I’d achieved what I’d set out to do that evening way sooner than expected, and so I decided to take some test images before going to bed. I was in suburbia, so I started getting 2 minute exposures in RGB on M20, the Trifid Nebula.
The image
Here’s the image. As an image it’s not going to set the world on fire, but as a test it shows the tracking was not bad. The image is noisy and speckled because it’s only 36 minutes in total. After all, I had to go to work the next day!
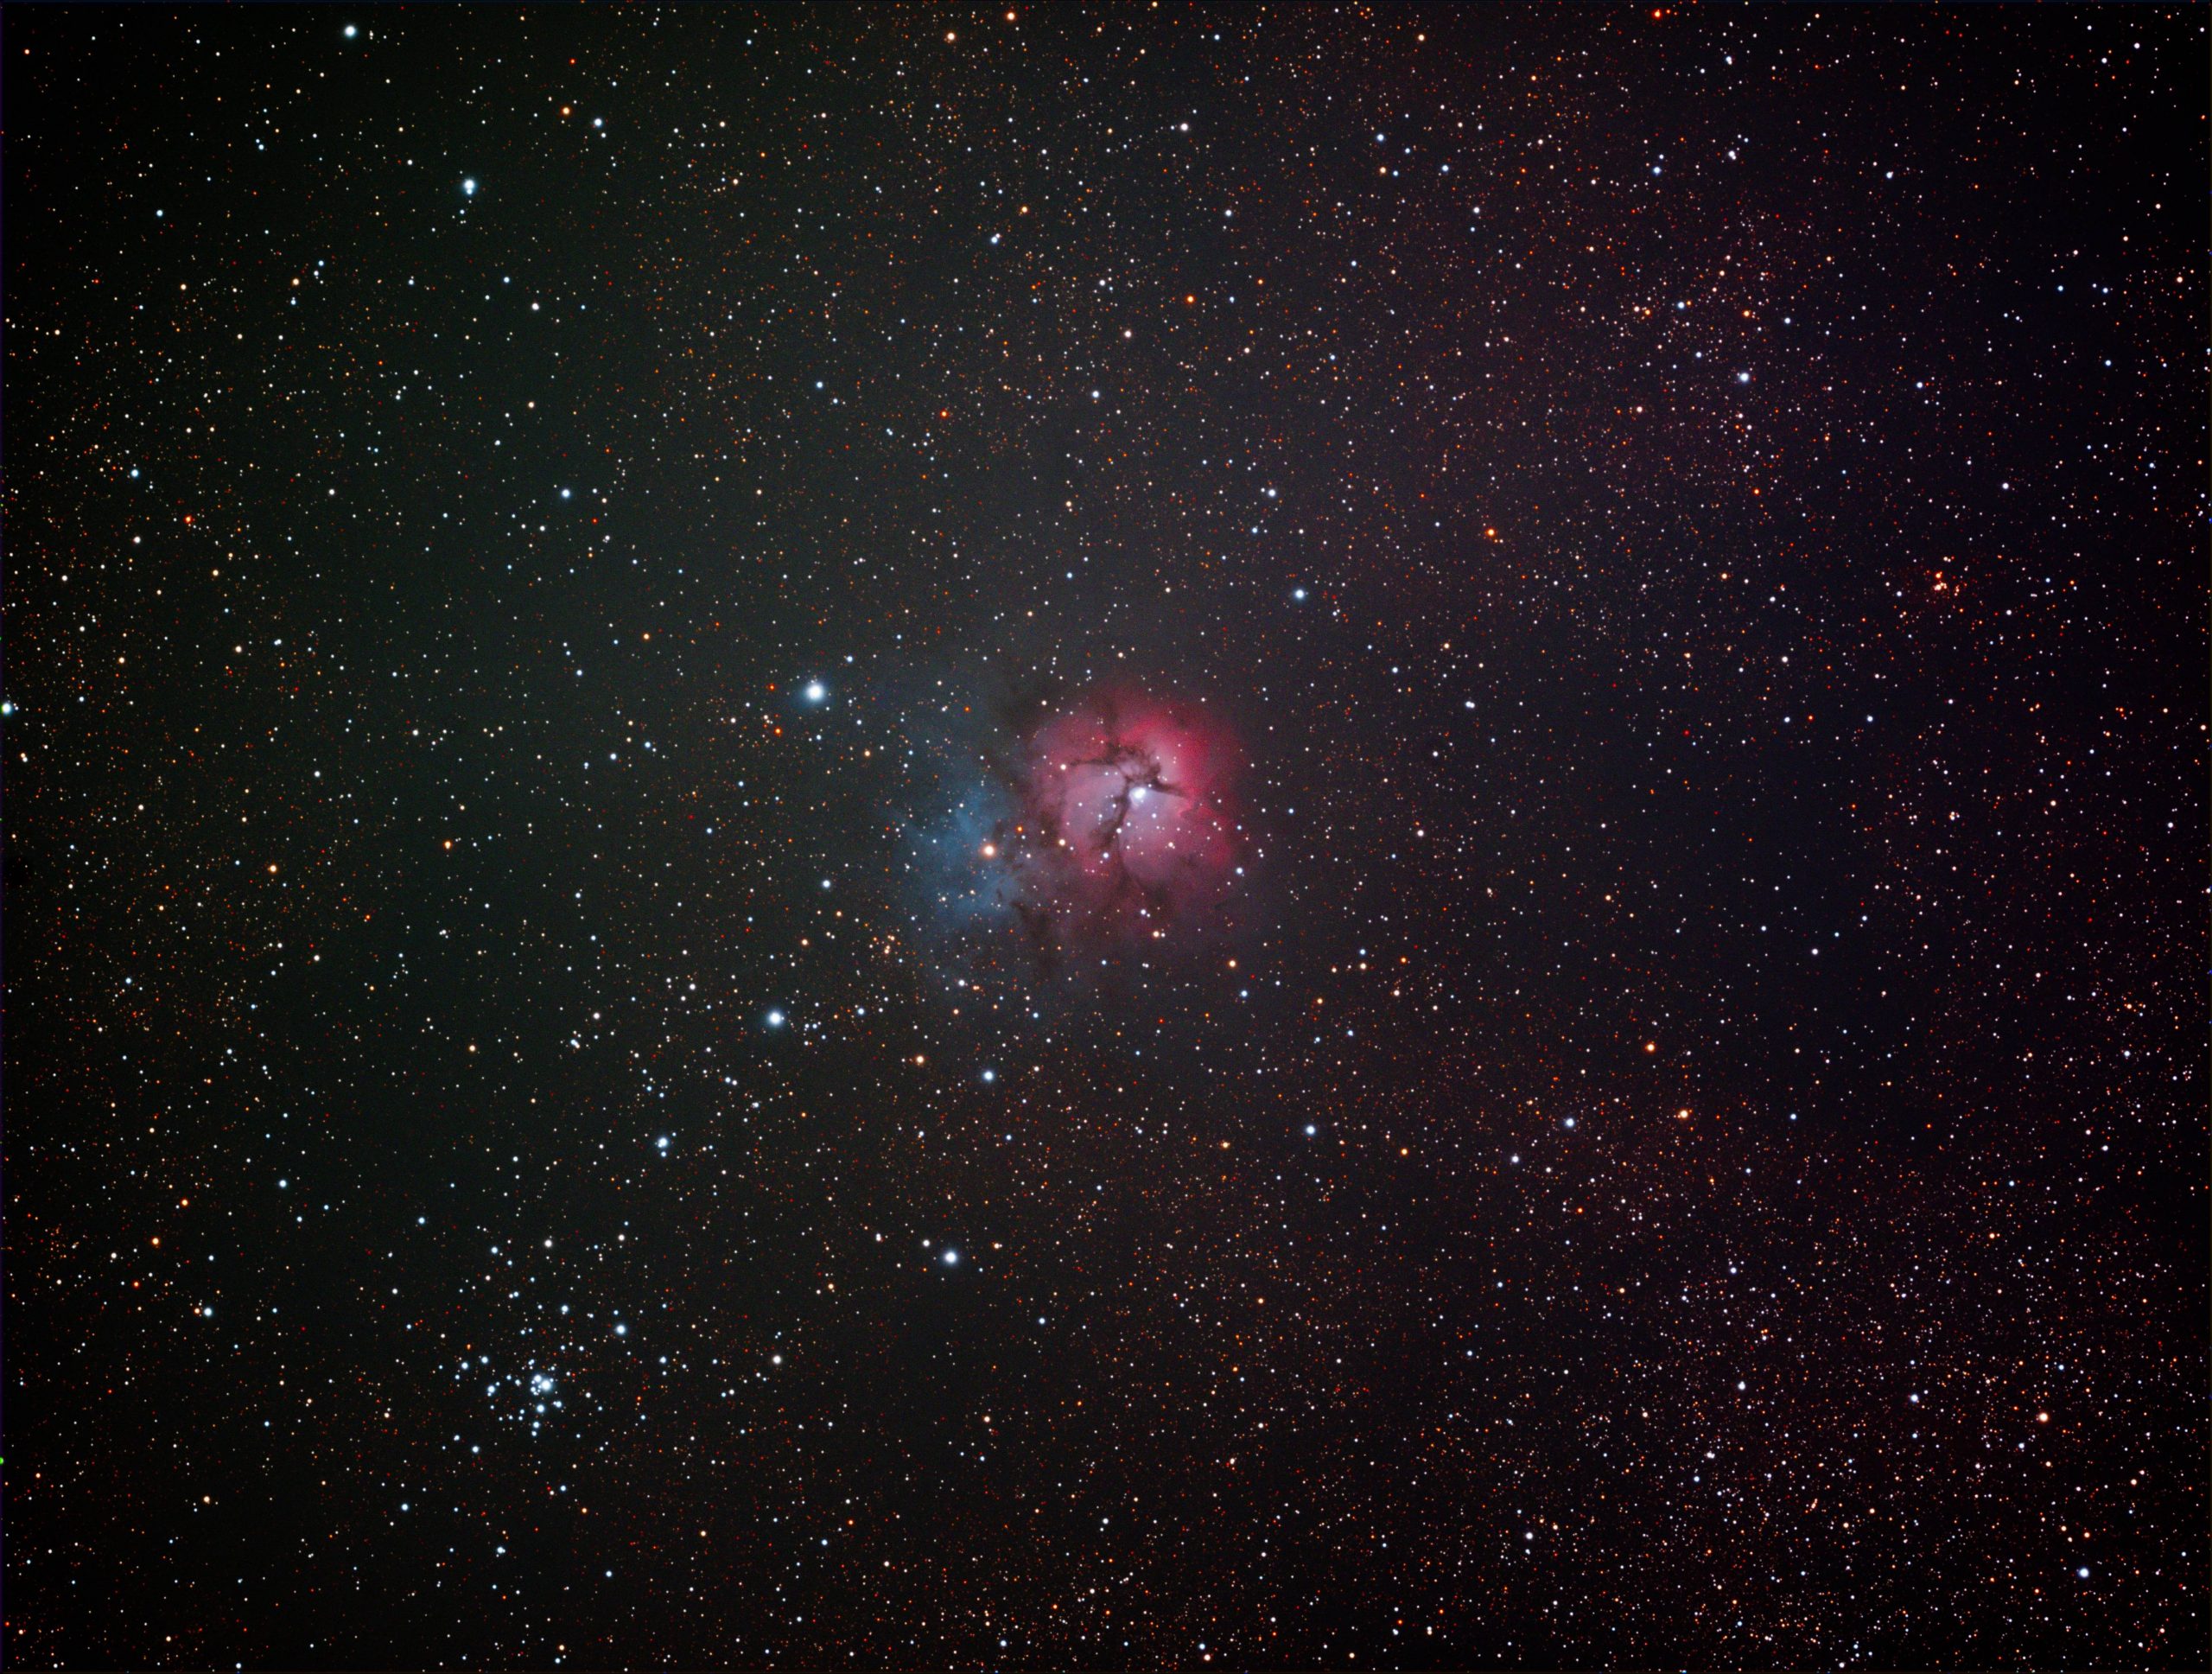
I’ve also heavily cropped it. The uncropped view (which I added below) shows very clearly that it’s lacking any calibration images – you can see a vignetted haze over the whole field, which was largely a result of light pollution.
More advanced: autoguiding the mount
I hadn’t considered autoguiding strategies at all – how to set up PHD so it provides the best possible tracking. I honestly hadn’t expected to get that far on the first outing.
What I did was to slew the mount near the equator and calibrate PHD. What I didn’t do was disable PHD’s predictive algorithms. Not only are these useless with an encoder-equipped mount, I understand they’re actively detrimental to guiding. Any guiding algorithm based on predictions of what’s coming up are not required because the encoders compensate for any variations. As it was, PHD was fighting against the mount’s existing brains and wouldn’t produce good guiding.
However, the image shows that even with all this, the guiding was pretty good. I guess it means that I can expect a lot of improvement with some work.
What next?
I’m looking forward to getting to grips with this mount. It’s light, easy to work with, easy to align and I suspect that, with a bit of work, it’s going to be very accurate.


